
Solo Stove Survival Camping Stove
How it Works
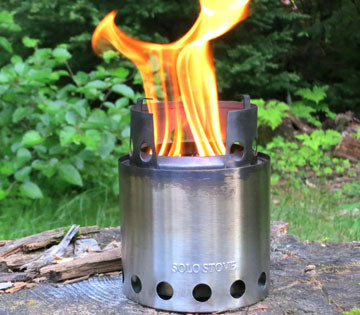
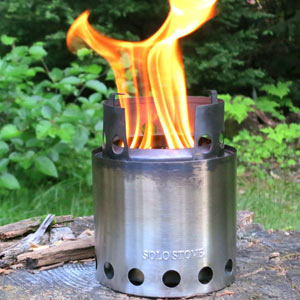
Designed with a double wall, the Solo Stove is a natural convection inverted downgas gasifer stove. The air intake holes on the bottom of the stove channels air to the bottom of the fire while at the same time, channels warm air up between the walls of the stove. This burst of preheated oxygen feeding back into the firebox through the smaller holes at the top of the stove causes a secondary combustion. This allows the fire to burn more complete which is why there is very little smoke during full burn.
A more efficient burn also means you'll use much less wood compared to an open camp fire. The Solo Stove doesn't just burn wood. It actually cooks the smoke out of the wood and then burns the smoke not once, but twice!
Product Description
Fast to boil: 8-10 minutes to boil 32 fl oz of water
Fuel: Burns sticks, twigs, pine cones and other biomass
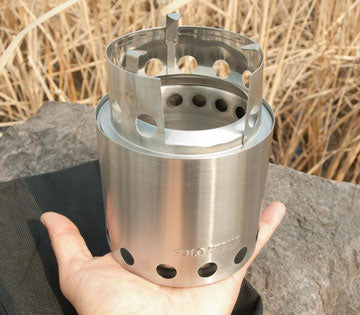
Packed size: Height 3.8 inches, Width 4.25 inches
Assembled size: Height 5.7 inches, Width 4.25 inches
Weight: 9 oz
Materials: Hardened 304 stainless steel, nichrome wire
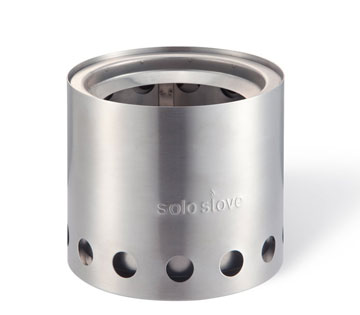
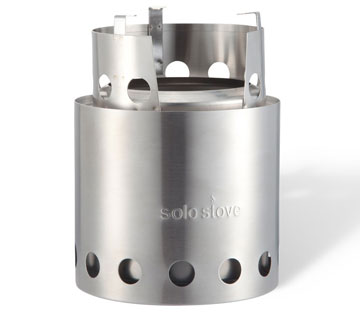
The Solo Stove also features a heat shield between the ash pan and the bottom of the stove. This heat shield protects the ground under the stove from scorching. The cooking ring's angled lip also increases efficiency by directing heat towards your pot minimizing heat loss. It also acts as a windshield while still allowing oxygen to flow inward.
The Solo Stove is indeed one of the most efficient wood burning stoves you'll ever own.
Built to Last
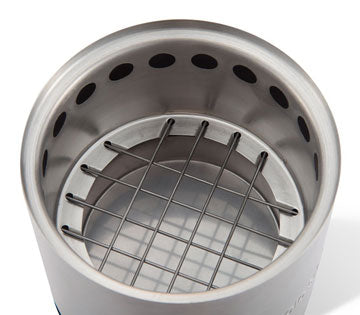
Your Solo Stove is made by using a one piece construction process. This manufacturing process allows us to use state-of-the-art precision presses to form and shape solid pieces of high grade stainless steel. The outer shell of your Solo Stove is actually one entire piece of stainless steel with no seams or welds. The inner firebox and floating ash pan is also made using one piece construction. This eliminates the need for excessive welding and increases the overall strength and lifespan of your stove. Nichrome wire, which has a high melting point of 2552 degrees Fahrenheit, is used for the grate.
Solo Stove Instructions
Step 1: Assemble Your Stove
Place your stove on level ground away from wind. If you have a windscreen, set it up to provide additional wind blockage. A windscreen will greatly increase the efficiency of your stove. For added safety, clear away any flammable ground debris within 5 ft. of the stove (twigs, leaves, grass etc.). Remove the nested cooking ring from inside the stove, invert it with the three pot stands facing up and place it on top of the stove.
Step 2: Prepare Your Fuel
Gather dry twigs and other bio-fuel of different sizes. Break them into finger length pieces and separate them into piles according to their thickness (small, medium, large).
Step 3: Starting Your Fire
The following two methods can be used to start a fire in your stove.
Method 1: The best and most fuel-efficient way to cook on your stove is with a full load of fuel that is lit on top. To use this method, place large sticks and twigs neatly on top of the nichrome wire grate up until the bottom of the top air vents. Then light a small fire on top using your favorite tinder or fire starter. Feed the fire with small to medium sized sticks and tinder until the fire is self-sustaining. Continue to feed the fire until it has spread across the full width of the stove and the main fuel load begins to burn from the top down. After the air in the wall of the stove heats up, airflow will improve and a secondary combustion will be visible near some or all of the secondary air vents. Start cooking. If your initial burn consumes your main fuel load and you find yourself still needed a flame to continue cooking, add in additional fuel through the opening in the cooking ring. Add finger sized twigs and other bio-fuel to maintain a flame.
Method 2: Using your favorite tinder or fire starter, light a small fire inside the stove and pile on small to medium sized twigs to stoke the fire. As the fire grows, add in larger sticks and twigs. Larger sticks and twigs will keep the fire burning longer and will decrease the amount of times you need to feed the fire. If too much fuel is added too late, especially with thick or damp sticks, there will be a lot of smoke and the fire may be snuffed. Experiment to find a suitable feed rate. With a little practice, the fire can be maintained for an extended period of time. This mode of operation, although often easier for beginners, will produce more smoke than Method 1 because the wood gas rises directly to combustion with the secondary air without the cleaning effect of passage through a hot layer of charcoal.
TIPS:
1. Always use dry wood when possible. Wet wood will take longer to burn and will produce more smoke.
2. Hardwoods (birch, maple, hickory, oak, etc.) will burn longer than softwoods.
3. As with every wood burning stove, some soot will be on the bottom of your pot after each use.
Softwoods will create the most soot while hardwoods like maple will create the least. The best way to minimize soot is to let the fire become well-established and hot before putting on a pot. To make cleaning up even easier, you can soap up the bottoms of your pot before use. Use a bar of soap and a little water to get your hands soapy, and then smear them on the bottom of your pot or pan before cooking. As you cook, the bottom will turn black, but will rinse off easily under water when you’re done.
CAUTION! The Solo Stove is NOT A TOY and should only be used by adults or under the supervision of an adult. The stove will be extremely hot when burning; do not touch it when in use. Never leave the stove unattended and be sure to douse all ashes and embers thoroughly with water after use. The Solo Stove is should not to be used indoors.